Vivitar VIVICAM 5028 User Manual
Browse online or download User Manual for Cameras Vivitar VIVICAM 5028. Vivitar VIVICAM 5028 User Manual
- Page / 53
- Table of contents
- TROUBLESHOOTING
- BOOKMARKS
- ViviCam 5028 Digital Camera 1
- Contents 2
- Introduction 3
- What’s Included 3
- Parts of the Camera 4
- Initial Camera Setup 5
- Setting the Camera Language 6
- Setting the Date and Time 6
- Main Camera Modes 7
- 1600 x 8
- Using Your Digital Camera 10
- Changing Camera Mode 10
- Navigating the Menus 11
- Photo Capture Mode 12
- Macro Switch / 14
- Photo Capture Mode Menus 15
- Scene Menu 16
- Image Resolution Menu 16
- Image Quality Menu 17
- Self-Timer Menu 17
- Anti-Shake Menu 18
- Face Detect Menu 18
- White Balance Menu 19
- Color Effect Menu 20
- Multi SnapShots Menu 20
- Image Sharpness Menu 21
- Light Exposure Menu 21
- ISO Menu 22
- Metering Menu 22
- Language Menu 23
- Date/Time Menu 24
- To Set the Date and Time: 24
- Silent Mode Menu 25
- Auto Power Off Menu 25
- Frequency Menu 26
- Format Memory Card Menu 26
- Photo Playback Mode 27
- Thumbnail View 28
- Photo Playback Mode Menus 29
- Rotate Menu 30
- Crop Image Menu 30
- Protect/Lock Menu 31
- Print Photos Menu 31
- Slide Show Menu 32
- Video Capture Mode 33
- Video Capture Mode Menus 34
- Firmware Menu 43
- Video Playback Mode 44
- Video Playback Mode Menus 45
- ViviLink Menu 46
- Installing the Software 47
- Get started! 50
- Camera Maintenance 51
- Sakar Warranty Card 52
- Technical Support 53
- Troubleshooting 53
Summary of Contents
ViviCam 5028 Digital Camera User Manual © 2010 Sakar International, Inc. All rights reserved. Windows and the Windows logo are reg
9 Using Your Digital Camera Make sure the batteries have been inserted properly into your digital camera. If your camera comes with a rechargeable li
10 To change the active camera mode, make sure the camera is powered ON and press the MODE button on the back of the camera. When in Photo Capture
11 Photo Capture Mode The Photo Capture mode allows you to capture pictures with your digital camera. Taking a Picture 1) While in Photo Capture mo
12 Photo Capture Mode Quick Function Buttons Your digital camera has a four-directional pad that functions as Quick Function buttons: Button Icon
13 Macro Switch / Your camera contains a Macro Switch that allows you to manually enable or disable the Macro mode on your camera. While using the
14 Photo Capture Mode Menus The following are the menus that appear in your camera‟s Photo Capture Mode:
15 Scene Menu The Scene Menu allows you to choose scene settings that allow your camera to adapt properly to your current environment. 1) Press th
16 Image Quality Menu The Image Quality menu allows you to select the desired quality level of the images taken by your camera. Keep in mind that i
17 9) Remember that this setting will be saved by your camera until you manually change the setting or restore the camera‟s default factory settings
18 Facing the camera - The face of the subject(s) you are photographing must be facing the camera and must hold the pose for at least 4 to 5 secon
1 Contents Introduction ...
19 9) Remember that this setting will be saved by your camera until you manually change the setting or restore the camera‟s default factory settings
20 9) Remember that this setting will be saved by your camera until you manually change the setting or restore the camera‟s default factory settings
21 6) Press the LEFT or RIGHT button to select the next menu item. 7) Press the MODE button to exit the menu and return to your previous mode. 8)
22 Center – Averages the light metered from the entire frame, but giving greater weight to the subject in the center Multi – Used in standard conditi
23 8) Remember that this setting will be saved by your camera until you manually change the setting or restore the camera‟s default factory settings
24 8) Press the MODE button to exit the menu and return to your previous screen. Silent Mode Menu You have the option of activating the camera‟
25 Frequency Menu The options in the Frequency menu represent the frequency of the electrical current in fluorescent lighting sources in your locale
26 6) Select “No” to exit without formatting. 7) Select “Yes” and press the SET button to begin the format. 8) The memory card will be completely
27 Zooming In/Out on a Photo Press the T / Zoom In button to zoom in on a photo on your camera. Use the direction buttons to navigate around the phot
28 Photo Playback Mode Menus The following are the menus that appear in your camera‟s Photo Playback Mode: Delete Menu While in the Playback Mo
2 Introduction Thank you for purchasing this camera. Everything you need to take quality digital photos and videos is included with your camera. Viv
29 4) Press the SET button to select the desired option. 5) A selected option icon will appear on the selected item. 6) An icon will appear on
30 6) Use the directional buttons to move the crop box to define the desired crop area. 7) Use the W/T Zoom buttons on the camera to enlarge or shr
31 6) You will be asked to connect the camera to the Pictbridge printer. 7) Connect the USB cable provided in the package form the camera to the Pi
32 Video Capture Mode The Video Capture Mode allows you to capture videos with your digital camera. When the camera is first powered ON, the camera w
33 Video Capture Mode Menus The following are the menus that appear in your camera‟s Video Capture Mode:
34 Scene Menu The Scene Menu allows you to choose scene settings that allow your camera to adapt properly to your current environment. 1) Press
35 Image Quality Menu The Image Quality menu allows you to select the desired quality level of the images taken by your camera. Keep in mind that
36 White Balance Menu The White Balance feature allows your camera to adjust the coloring of the captured images depending on the type of light sou
37 Image Sharpness Menu You can set the level of sharpness in the images taken with your camera. The sharpness level dictates if the edges of objec
38 6) Press the LEFT or RIGHT button to select the next menu item. 7) Press the MODE button to exit the menu and return to your previous mode. 8)
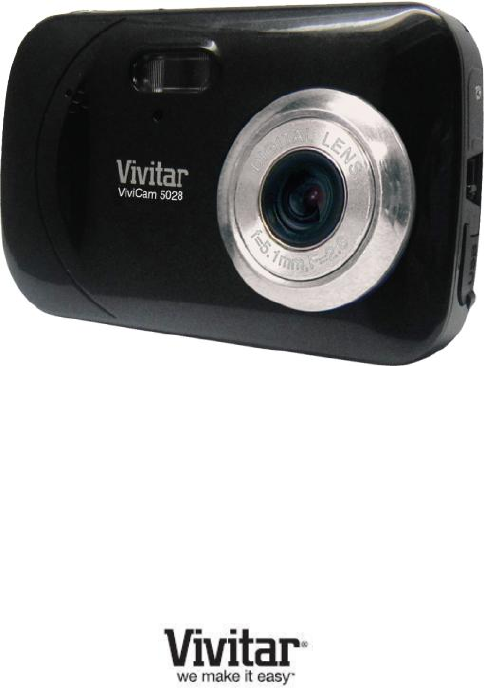
3 Parts of the Camera 1. Power button 2. Shutter button 3. LCD Screen 4. LED 5. Zoom Out 6. Zoom In 7. MODE button 8. SET button 9. Scene /
39 Multi – Used in standard conditions the camera divides and adjusts the settings of the image into several zones for light metering such as complex
40 Date/Time Menu When you capture an image with your camera, the image will include a time stamp with the date and time that the image was taken.
41 Auto Power Off Menu You can use the Auto Power Off feature in order to conserve you camera‟s battery life. The designated time represents when y
42 8) Remember that this setting will be saved by your camera until you manually change the setting or restore the camera‟s default factory settings
43 7) A message will appear indicating that the settings have been reset successfully. Video Playback Mode When you first turn on the camera, the
44 Video Playback Mode Quick Function Buttons Your digital camera has a four-directional pad that functions as Quick Function buttons. Button Acti
45 ViviLink Menu The ViviLink technology allows you to quickly and easily upload your camera‟s photos and videos to the social networks of your cho
46 Installing the Software You must be connected to the internet to install and run the Vivitar Experience Image Manager software. 1) Insert the in
47 Note: If you do not have internet access, you can still download media from the camera. Click the “How to transfer photos and videos from my camer
48 Getting Photos and Videos from your Camera to Your Computer An SD card needs to be inserted. Do not disconnect the cable during transfer. Doing so
4 Initial Camera Setup When powering the camera ON for the first time the camera will take you through the initial camera setup. Powering the C
49 Get started! Using the Vivitar Experience Image Manager, you can: Upload and manage photos and videos to and from the most popular photo sharin
50 Transfer media from my camera to my computer manually (Using Macintosh) 1) Use the USB cable that came with your camera to connect your camera t
51 Sakar Warranty Card This warranty covers for the original consumer purchaser only and is not transferable. Products that fail to function properly
52 Technical Support For technical support issues please visit our website at www.vivitar.com. You can find manuals, software and FAQ‟s at the websit
5 Setting the Camera Language 1) You will first be prompted to select a language for the camera. The Language selection menu will appear. Select the
6 Main Camera Modes Your camera has different modes for the various camera functions. You can switch modes by pressing the MODE button on your camera
7 Camera Technical Specifications Image Sensor CMOS Sensor Image Resolution (5M) 2592x1944 pixels, (3M) 2048x1536 pixels, (2M) 1600 x 1200 pixels, (2
8 Computer System Requirements – WINDOWS OS To be able to download photos and videos to your PC, you will need the following minimum configuration:
Related products and manuals for Cameras Vivitar VIVICAM 5028
 (85 pages)
(63 pages)
(47 pages)
(65 pages)
(18 pages)
(55 pages)
(24 pages)
(48 pages)
(55 pages)
(61 pages)
(45 pages)
(52 pages)
(58 pages)
(32 pages)
(61 pages)
(35 pages)
(54 pages)
(81 pages)
(85 pages)
(63 pages)
(47 pages)
(65 pages)
(18 pages)
(55 pages)
(24 pages)
(48 pages)
(55 pages)
(61 pages)
(45 pages)
(52 pages)
(58 pages)
(32 pages)
(61 pages)
(35 pages)
(54 pages)
(81 pages)
© 2020, manymanuals.com. All rights reserved. | 4.952 s |
 Manymanuals.com
 Manymanuals.de
 Manymanuals.fr
 Manymanuals.it
 Manymanuals.pl
 Manymanuals.cz
 Manymanuals.es
 Manymanuals-pt.com
Comments to this Manuals