Vivitar ViviCam S529 User Manual Page 6
- Page / 56
- Table of contents
- TROUBLESHOOTING
- BOOKMARKS
- ViviCam S529 Digital Camera 1
- Contents 2
- Introduction 3
- What Your Camera Includes 3
- Parts of the Camera 4
- Initial Camera Setup 5
- Setting the Camera Language 6
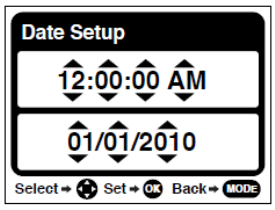
- Setting the Date and Time 6
- Main Camera Modes 7
- Using Your Digital Camera 10
- Changing Camera Mode 10
- Navigating the Menus 11
- Photo Capture Mode 12
- Flash Options 13
- Photo Capture Mode Menus 13
- Scene Menu 14
- Image Quality Menu 15
- Image Resolution Menu 15
- Self-Timer Menu 16
- Anti-Shake Menu 16
- Face Detect Menu 17
- Smile Capture Menu 18
- Macro Menu 19
- White Balance Menu 20
- Color Effect Menu 20
- Multi SnapShots Menu 21
- Image Sharpness Menu 21
- Light Exposure Menu 22
- ISO Menu 22
- Metering Menu 23
- Language Menu 24
- Date/Time Menu 24
- Silent Mode Menu 25
- Auto Power Off Menu 26
- Frequency Menu 26
- Format Memory Card Menu 27
- Photo Playback Mode 28
- Thumbnail View 29
- Photo Playback Mode Menus 29
- Delete Menu 30
- ViviLink Menu 30
- Rotate Menu 31
- Crop Image Menu 31
- Protect/Lock Menu 32
- Print Photos Menu 32
- Slide Show Menu 33
- Video Capture Mode 34
- Video Capture Mode Menus 35
- Image Size Menu 36
- Audio Menu 44
- Video Playback Mode 46
- Video Playback Mode Menus 48
- Installing the Software 50
- Get started! 53
- Camera Maintenance 54
- Sakar Warranty Card 55
- Technical Support 56
- Troubleshooting 56
Related products and manuals for Bridge cameras Vivitar ViviCam S529
 (64 pages)
(74 pages)
(57 pages)
(64 pages)
(74 pages)
(57 pages)
 (39 pages)
 (77 pages)
 (63 pages)
© 2020, manymanuals.com. All rights reserved. | 0.686 s |
 Manymanuals.com
 Manymanuals.de
 Manymanuals.fr
 Manymanuals.it
 Manymanuals.pl
 Manymanuals.cz
 Manymanuals.es
 Manymanuals-pt.com
Comments to this Manuals